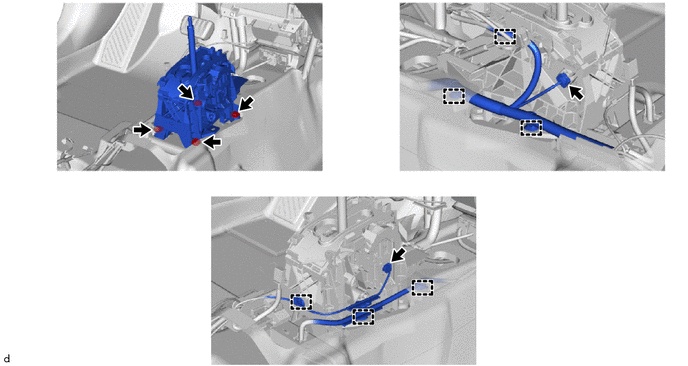
Toyota Corolla Cross: Removal
REMOVAL
CAUTION / NOTICE / HINT
COMPONENTS (REMOVAL)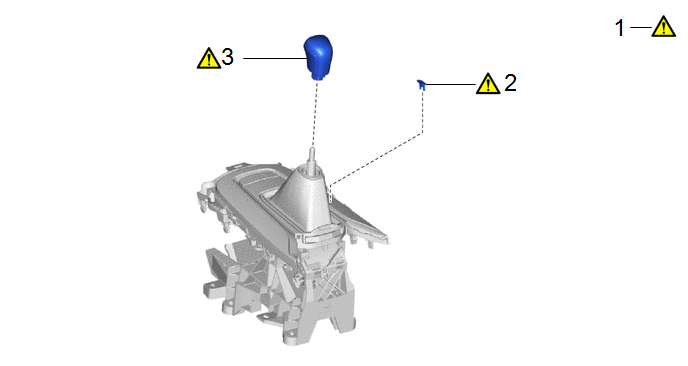
|
Procedure |
Part Name Code |
.png) |
.png) |
.png) |
|
|---|---|---|---|---|---|
|
1 |
SECURE VEHICLE |
- |
|
- |
- |
|
2 |
SHIFT LOCK RELEASE BUTTON COVER |
33554C |
|
- |
- |
|
3 |
SHIFT LEVER KNOB SUB-ASSEMBLY |
33504F |
|
- |
- |
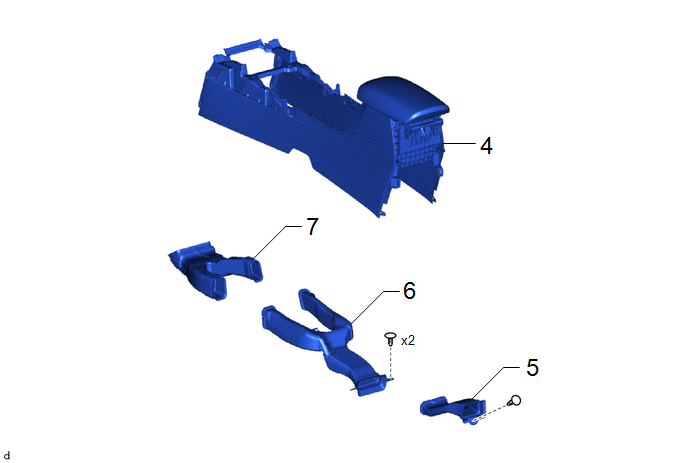
|
Procedure |
Part Name Code |
|
|
|
|
|---|---|---|---|---|---|
|
4 |
CONSOLE BOX ASSEMBLY |
58810J |
- |
- |
- |
|
5 |
NO. 3 CONSOLE BOX DUCT |
58863A |
- |
- |
- |
|
6 |
NO. 2 CONSOLE BOX DUCT |
58862B |
- |
- |
- |
|
7 |
NO. 1 CONSOLE BOX DUCT |
58861B |
- |
- |
- |
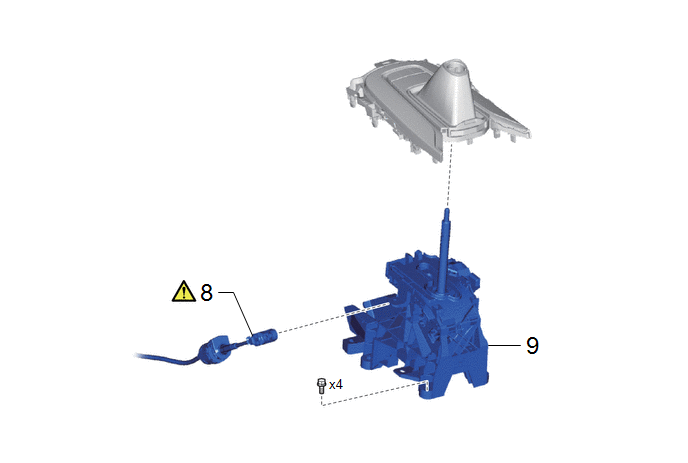
|
Procedure |
Part Name Code |
|
|
|
|
|---|---|---|---|---|---|
|
8 |
TRANSMISSION CONTROL CABLE ASSEMBLY |
33820B |
|
- |
- |
|
9 |
TRANSMISSION FLOOR SHIFT ASSEMBLY |
- |
- |
- |
- |
PROCEDURE
1. SECURE VEHICLE
|
|
Click here |
2. REMOVE SHIFT LOCK RELEASE BUTTON COVER
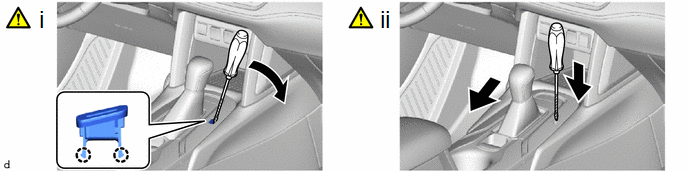
(1) Using a screwdriver with its tip wrapped with protective tape, disengage the 2 claws to remove the shift lock release button cover from the position indicator housing assembly.
NOTICE:
Be careful not to damage the shift lock release button cover and position indicator housing assembly.
(2) Using a screwdriver with its tip wrapped with protective tape, push the shift lock release button to move the shift lever to N.
NOTICE:
Be careful not to damage the transmission floor shift assembly.
3. REMOVE SHIFT LEVER KNOB SUB-ASSEMBLY
|
|
Click here |
4. REMOVE CONSOLE BOX ASSEMBLY
Click here .gif)
5. REMOVE NO. 3 CONSOLE BOX DUCT
Click here
6. REMOVE NO. 2 CONSOLE BOX DUCT
Click here
7. REMOVE NO. 1 CONSOLE BOX DUCT
Click here
8. DISCONNECT TRANSMISSION CONTROL CABLE ASSEMBLY
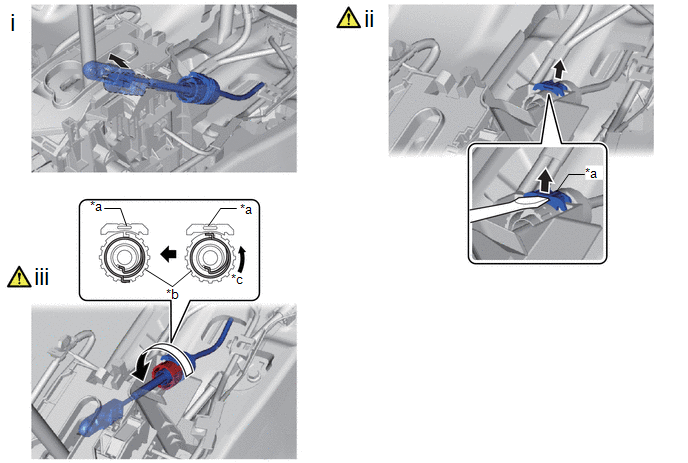
|
*a |
Stopper |
*b |
Nut |
|
*c |
Turn approximately 180° |
- |
- |
(1) Disconnect the end of the transmission control cable assembly from the transmission floor shift assembly.
(2) Using a screwdriver, pull out the stopper of the transmission control cable assembly.
NOTICE:
Do not remove the stopper. If it is removed, reinstall it to its original position.
(3) Rotate the nut of the transmission control cable assembly approximately 180° counterclockwise and, while holding the nut in that position, disconnect the transmission control cable assembly from the transmission floor shift assembly.
NOTICE:
- Do not turn the nut excessively as the internal spring may come off and the transmission control cable assembly will not be reusable.
- Do not forcibly pull the transmission control select cable assembly into the cabin.
9. REMOVE TRANSMISSION FLOOR SHIFT ASSEMBLY