Toyota Corolla Cross: Removal
REMOVAL
CAUTION / NOTICE / HINT
COMPONENTS (REMOVAL)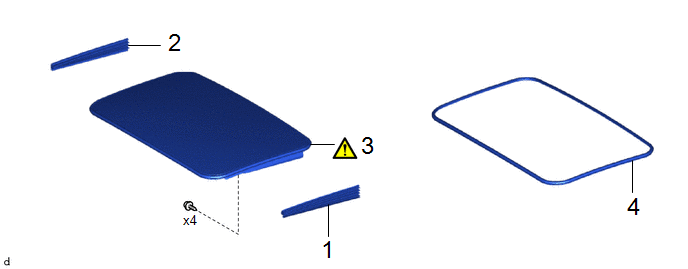
|
Procedure | Part Name Code |
.png) |
.png) |
 |
|---|---|---|---|---|---|
|
1 | SLIDING ROOF SIDE GARNISH LH |
63218G | - |
- | - |
|
2 | SLIDING ROOF SIDE GARNISH RH |
63217G | - |
- | - |
|
3 | SLIDING ROOF GLASS SUB-ASSEMBLY |
63201G |
|
- | - |
|
4 | SLIDING ROOF WEATHERSTRIP |
63251H | - |
- | - |
|
Procedure | Part Name Code |
|
|
| |
|---|---|---|---|---|---|
|
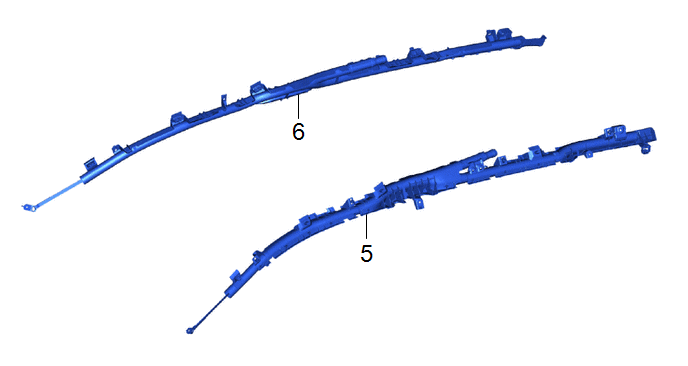
5 | CURTAIN SHIELD AIRBAG ASSEMBLY LH |
62180A | - |
- | - |
|
6 | CURTAIN SHIELD AIRBAG ASSEMBLY RH |
62170A | - |
- | - |
|
Procedure | Part Name Code |
|
|
| |
|---|---|---|---|---|---|
|
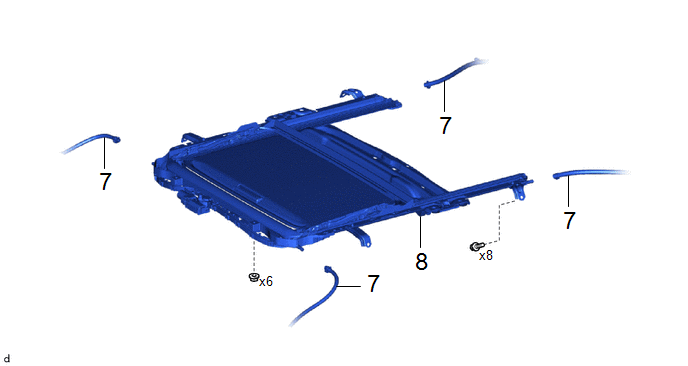
7 | SLIDING ROOF DRAIN HOSE |
- | - |
- | - |
|
8 | SLIDING ROOF HOUSING ASSEMBLY |
- | - |
- | - |
CAUTION / NOTICE / HINT
The necessary procedures (adjustment, calibration, initialization or registration) that must be performed after parts are removed and installed, or replaced during sliding roof housing assembly removal/installation are shown below.
Necessary Procedure After Parts Removed/Installed/Replaced|
Replaced Part or Performed Procedure |
Necessary Procedure | Effect/Inoperative Function When Necessary Procedures are not Performed |
Link |
|---|---|---|---|
| *1: Even when not replacing the part, it is necessary to perform the specified necessary procedures after installation. | |||
| Initialize sliding roof system |
|
|
PROCEDURE
1. REMOVE SLIDING ROOF SIDE GARNISH LH

2. REMOVE SLIDING ROOF SIDE GARNISH RH
(a) Use the same procedure as for the LH side.
3. REMOVE SLIDING ROOF GLASS SUB-ASSEMBLY
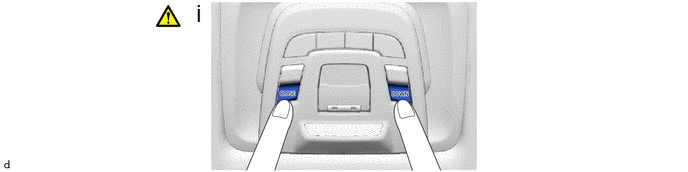
(1) Move the sliding roof glass sub-assembly to the fully closed position.
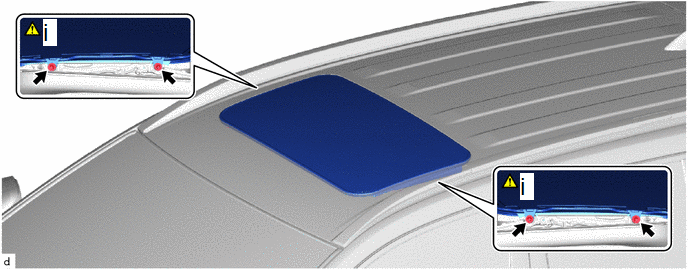
(1) Using a T25 "TORX" socket wrench, remove the 4 screws and sliding roof glass sub-assembly.
NOTICE:
To prevent the sliding roof glass sub-assembly and sliding roof drive gear sub-assembly from becoming misaligned, move the sliding roof glass sub-assembly (sliding roof drive cable sub-assembly) to the fully closed position before removing it.
4. REMOVE SLIDING ROOF WEATHERSTRIP

5. REMOVE CURTAIN SHIELD AIRBAG ASSEMBLY LH
Click here .gif)
6. REMOVE CURTAIN SHIELD AIRBAG ASSEMBLY RH
(a) Use the same procedure as for the LH side.
7. DISCONNECT SLIDING ROOF DRAIN HOSE
HINT:
Use the same procedure for all of the sliding roof drain hoses.

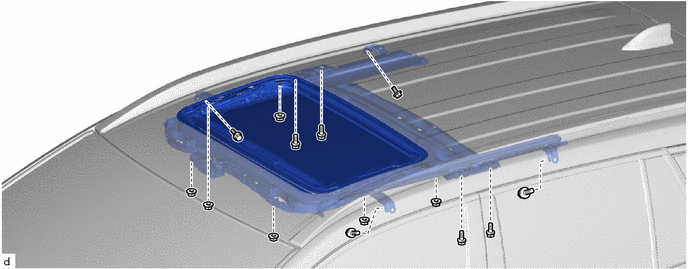
8. REMOVE SLIDING ROOF HOUSING ASSEMBLY