Toyota Corolla Cross: Removal
REMOVAL
CAUTION / NOTICE / HINT
COMPONENTS (REMOVAL)
|
Procedure | Part Name Code |
.png) |
.png) |
.png) |
|
1 | WASHER NOZZLE SUB-ASSEMBLY |
85035 |
.gif) |
- | - |
|
â—Ź | Non-reusable part |
- | - |
PROCEDURE
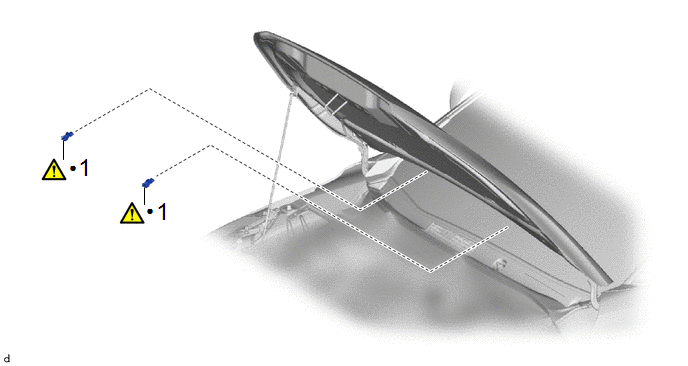
1. REMOVE WASHER NOZZLE SUB-ASSEMBLY

.png) |
Separate in this Direction (1) |
.png) |
Separate in this Direction (2) |
(1) Using a screwdriver with its tip wrapped with protective tape, disengage the claws to separate the washer nozzle sub-assembly as shown in the illustration.
NOTICE:
Be careful not to damage the windshield glass.
(2) Disconnect the washer hose to remove the washer nozzle sub-assembly.
NOTICE:
Washer nozzle sub-assemblies cannot be reused.
READ NEXT:
ADJUSTMENT PROCEDURE 1. REMOVE WASHER NOZZLE SUB-ASSEMBLY
Click here 2. ADJUST WASHER NOZZLE SUB-ASSEMBLY
(a) Select a washer nozzle sub-assembly so that the position the washer fluid hits the win
INSTALLATION CAUTION / NOTICE / HINT COMPONENTS (INSTALLATION)
Procedure Part Name Code
1 INSTALL WASHER NOZZLE SUB-ASSEMBLY
85035 -
- -
2 INSPE
On-vehicle InspectionON-VEHICLE INSPECTION PROCEDURE
1. INSPECT REAR WASHER NOZZLE (a) Operate the rear washer nozzle and check the position that the washer fluid contacts the back door glass.
Stand
SEE MORE:
CUSTOMIZE PARAMETERS CUSTOMIZE POWER DOOR LOCK CONTROL SYSTEM
HINT: The following items can be customized.
NOTICE:
When the customer requests a change in a function, first make sure that the function can be customized.
Be sure to make a note of the current settings before customizing.
INSPECTION PROCEDURE 1. INSPECT OUTER MIRROR LH
(a) Check the operation of the mirror heater.
(1) Measure the resistance according to the value(s) in the table below.
Standard Resistance:
Tester Connection Condition
Specified Condition
1 - 2 25°C
3.57 to 4.83 Î


