Toyota Corolla Cross: Removal
REMOVAL
CAUTION / NOTICE / HINT
COMPONENTS (REMOVAL)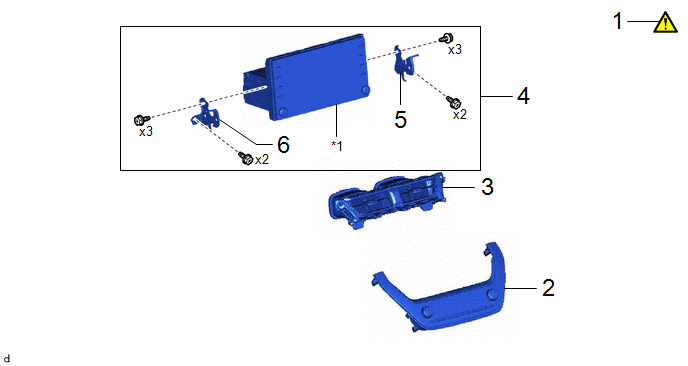
|
Procedure |
Part Name Code |
.png) |
.png) |
.png) |
|
|---|---|---|---|---|---|
|
1 |
PRECAUTION |
- |
|
- |
- |
|
2 |
AIR CONDITIONING CONTROL ASSEMBLY |
55900 |
- |
- |
- |
|
3 |
CENTER INSTRUMENT PANEL REGISTER ASSEMBLY |
55670A |
- |
- |
- |
|
4 |
RADIO AND DISPLAY RECEIVER ASSEMBLY WITH BRACKET |
- |
- |
- |
- |
|
5 |
NO. 1 RADIO RECEIVER BRACKET |
86211J |
- |
- |
- |
|
6 |
NO. 2 RADIO RECEIVER BRACKET |
86212C |
- |
- |
- |
|
*1 |
RADIO AND DISPLAY RECEIVER ASSEMBLY |
- |
- |
CAUTION / NOTICE / HINT
The necessary procedures (adjustment, calibration, initialization, or registration) that must be performed after parts are removed and installed, or replaced during radio and display receiver assembly removal/installation are shown below.
Necessary Procedures After Parts Removed/Installed/Replaced|
Replaced Part or Performed Procedure |
Necessary Procedure |
Effect/Inoperative Function when Necessary Procedure not Performed |
Link |
|---|---|---|---|
| *1: w/ Telematics Transceiver | |||
|
Radio and display receiver assembly |
Software update |
- |
|
|
Register Vehicle Information*1 |
|||
PROCEDURE
1. PRECAUTION
|
|
NOTICE: When replacing the radio and display receiver assembly, always replace it with a new one. If a radio and display receiver assembly which was installed to another vehicle is used, the following may occur:
Click here |
2. REMOVE AIR CONDITIONING CONTROL ASSEMBLY
Click here .gif)
3. REMOVE CENTER INSTRUMENT PANEL REGISTER ASSEMBLY
Click here
4. REMOVE RADIO AND DISPLAY RECEIVER ASSEMBLY WITH BRACKET
HINT:
The illustrations are representative examples, and details may differ.
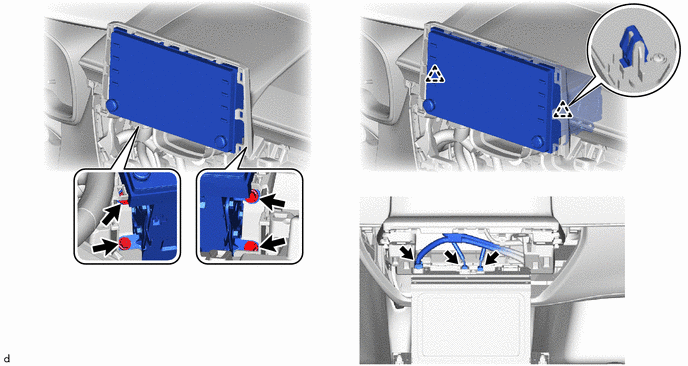
5. REMOVE NO. 1 RADIO RECEIVER BRACKET

6. REMOVE NO. 2 RADIO RECEIVER BRACKET
(a) Use the same procedure for the No. 1 radio bracket.


