Toyota Corolla Cross: M20a-fks Air Cleaner Filter Element
Removal
REMOVAL
CAUTION / NOTICE / HINT
COMPONENTS (REMOVAL)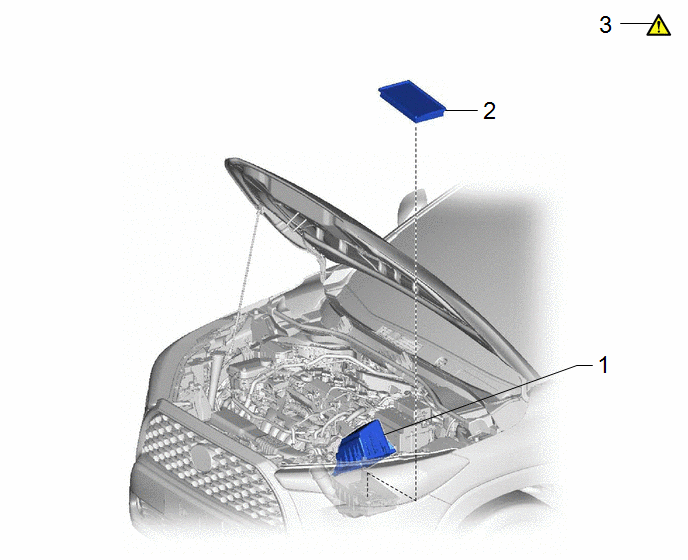
|
Procedure |
Part Name Code |
.png) |
.png) |
.png) |
|
|---|---|---|---|---|---|
|
1 |
AIR CLEANER CAP SUB-ASSEMBLY |
- |
- |
- |
- |
|
2 |
AIR CLEANER FILTER ELEMENT SUB-ASSEMBLY |
17801 |
- |
- |
- |
|
3 |
INSPECT AIR CLEANER FILTER ELEMENT SUB-ASSEMBLY |
17801 |
|
- |
- |
.gif)
PROCEDURE
1. SEPARATE AIR CLEANER CAP SUB-ASSEMBLY
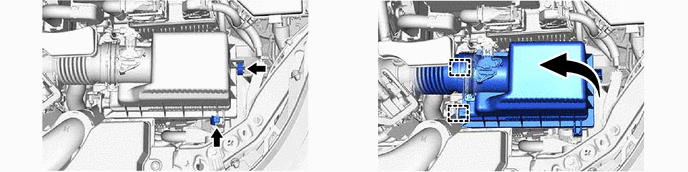
2. REMOVE AIR CLEANER FILTER ELEMENT SUB-ASSEMBLY

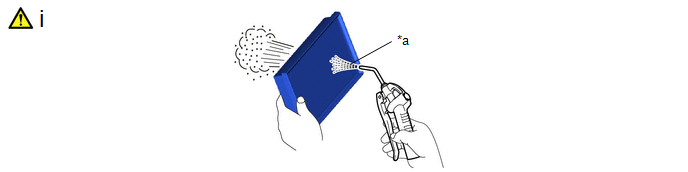
3. INSPECT AIR CLEANER FILTER ELEMENT SUB-ASSEMBLY
|
|
HINT: This procedure is only performed when the air cleaner filter element sub-assembly will be reused. |
|
*a |
Air Cleaner Filter Element Sub-assembly Intake Downstream Side (Air Cleaner Cap Sub-assembly Side) |
- |
- |
(1) If the air cleaner filter element sub-assembly is dirty or has foreign matter adhered to it, clean the air cleaner filter element sub-assembly with compressed air.
NOTICE:
When cleaning the air cleaner filter element sub-assembly, blow the compressed air from the intake downstream side (from the air cleaner cap sub-assembly side).
(2) If the air cleaner filter element sub-assembly is still extremely dirty after cleaning it, replace the air cleaner filter element sub-assembly with a new one.
Installation
INSTALLATION
CAUTION / NOTICE / HINT
COMPONENTS (INSTALLATION)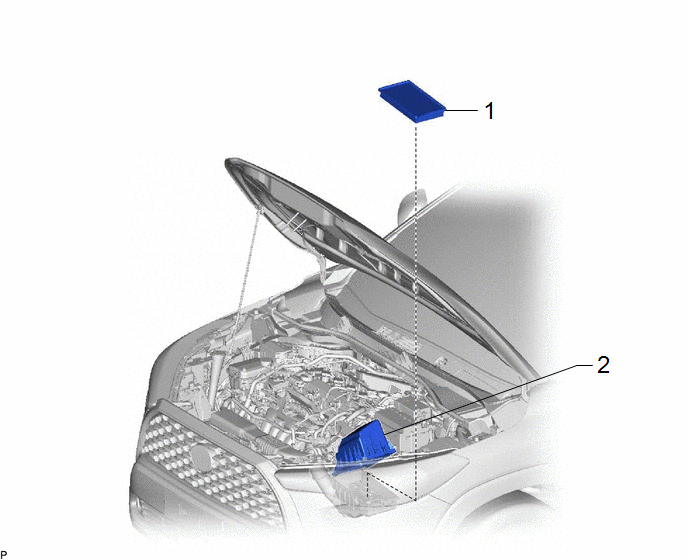
|
Procedure |
Part Name Code |
.png) |
.png) |
.png) |
|
|---|---|---|---|---|---|
|
1 |
AIR CLEANER FILTER ELEMENT SUB-ASSEMBLY |
17801 |
- |
- |
- |
|
2 |
AIR CLEANER CAP SUB-ASSEMBLY |
- |
- |
- |
- |
PROCEDURE
1. INSTALL AIR CLEANER FILTER ELEMENT SUB-ASSEMBLY
2. INSTALL AIR CLEANER CAP SUB-ASSEMBLY


