Toyota Corolla Cross: Tire And Wheel
Removal
REMOVAL
CAUTION / NOTICE / HINT
COMPONENTS (REMOVAL)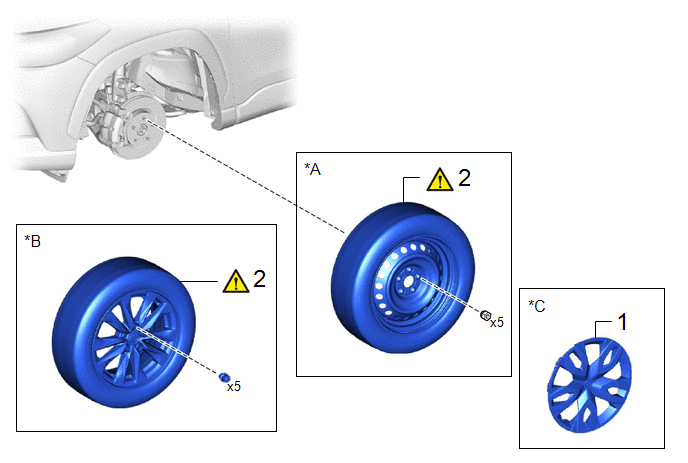
|
Procedure |
Part Name Code |
.png) |
.png) |
.png) |
|
|---|---|---|---|---|---|
|
1 |
WHEEL CAP |
42621 |
- |
- |
- |
|
2 |
WHEEL ASSEMBLY |
- |
|
- |
- |
.gif)
|
*A |
for Steel Wheel |
*B |
except Steel Wheel |
|
*C |
w/ Wheel Cap |
- |
- |
PROCEDURE
1. REMOVE WHEEL CAP (w/ Wheel Cap)

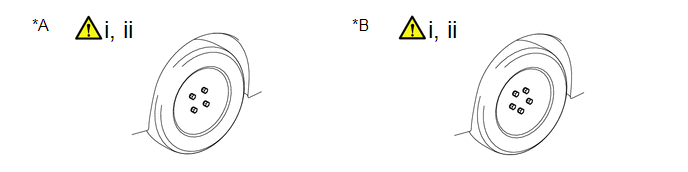
2. REMOVE WHEEL ASSEMBLY
|
*A |
for 4 Bolt Axle Hub |
*B |
for 5 Bolt Axle Hub |
(1) Loosen the axle hub nuts approximately 90°.
(2) Lift up the vehicle and remove the axle hub nuts and wheel assembly.
Installation
INSTALLATION
CAUTION / NOTICE / HINT
COMPONENTS (INSTALLATION)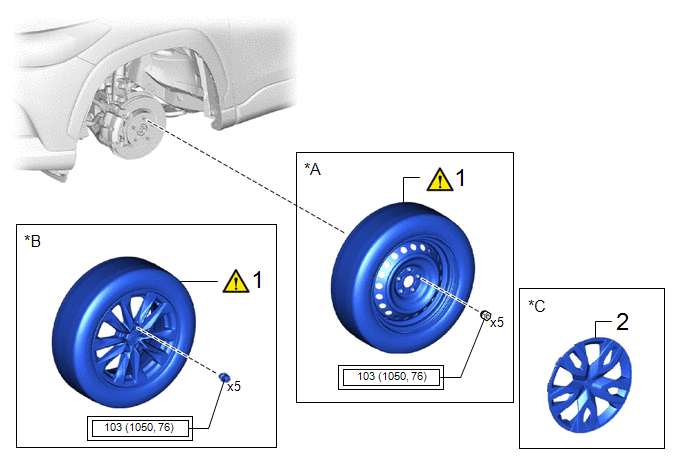
|
Procedure |
Part Name Code |
.png) |
.png) |
.png) |
|
|---|---|---|---|---|---|
|
1 |
WHEEL ASSEMBLY |
- |
|
- |
- |
|
2 |
WHEEL CAP |
42621 |
- |
- |
- |
.gif)
|
*A |
for Steel Wheel |
*B |
except Steel Wheel |
|
*C |
w/ Wheel Cap |
- |
- |
.png) |
Tightening torque for "Major areas involving basic vehicle performance such as moving/turning/stopping" : N*m (kgf*cm, ft.*lbf) |
- |
- |
PROCEDURE
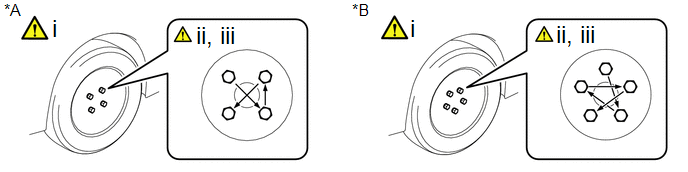
1. INSTALL WHEEL ASSEMBLY
|
|
NOTICE:
|
|
*A |
for 4 Bolt Axle Hub |
*B |
for 5 Bolt Axle Hub |
(1) While aligning the wheel assembly with the center of the axle hub, install the axle hub nuts by hand.
(2) Temporarily tighten the axle hub nuts in the order shown in the illustration.
(3) Lower the vehicle then fully tighten the axle hub nuts in the order shown in the illustration.
Torque:
103 N·m {1050 kgf·cm, 76 ft·lbf}
2. INSTALL WHEEL CAP (w/ Wheel Cap)


