Toyota Corolla Cross: Oil Pressure Sensor
Removal
REMOVAL
CAUTION / NOTICE / HINT
COMPONENTS (REMOVAL)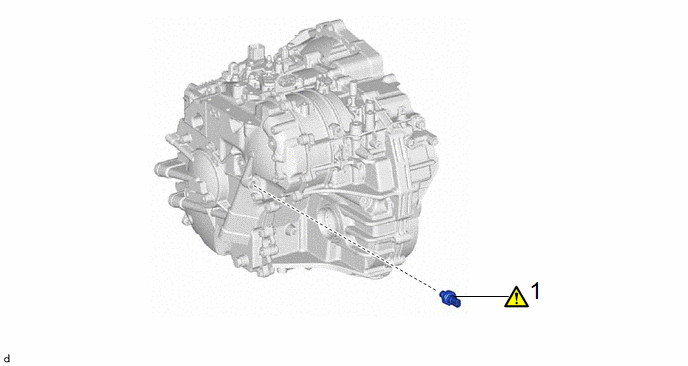
|
Procedure |
Part Name Code |
.png) |
.png) |
.png) |
|
|---|---|---|---|---|---|
|
1 |
OIL PRESSURE SENSOR |
89637K |
|
- |
- |
.gif)
CAUTION / NOTICE / HINT
The necessary procedures (adjustment, calibration, initialization, or registration) that must be performed after parts are removed and installed, or replaced during the oil pressure sensor removal/installation are shown below.
Necessary Procedure After Parts Removed/Installed/Replaced|
Replacement Part or Procedure |
Necessary Procedures |
Effect/Inoperative Function When Necessary Procedures are not Performed |
Link |
|---|---|---|---|
|
Oil pressure sensor |
|
Deterioration of fuel efficiency |
|
PROCEDURE
1. REMOVE OIL PRESSURE SENSOR
(1) Disconnect the oil pressure sensor connector.
(2) Using a 27 mm deep socket wrench, remove the oil pressure sensor from the rear transaxle case sub-assembly.
Installation
INSTALLATION
CAUTION / NOTICE / HINT
.png)
|
Procedure |
Part Name Code |
.png) |
.png) |
.png) |
|
|---|---|---|---|---|---|
|
1 |
OIL PRESSURE SENSOR |
89637K |
|
- |
- |
|
2 |
INSPECT FOR CONTINUOUSLY VARIABLE TRANSAXLE FLUID LEAK |
- |
|
- |
- |
|
3 |
RESET MEMORY |
- |
- |
- |
|
.png) |
N*m (kgf*cm, ft.*lbf): Specified torque |
.png) |
Toyota Genuine CVT Fluid FE |
PROCEDURE
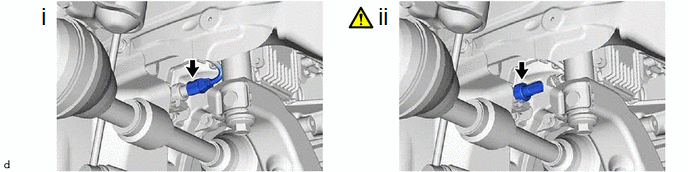
1. INSTALL OIL PRESSURE SENSOR
.png)
|
|
Toyota Genuine CVT fluid FE |
- |
- |
(1) Coat the O-ring of the oil pressure sensor with Toyota Genuine CVT fluid FE.
NOTICE:
If reusing the oil pressure sensor, check that the O-ring is not damaged.
(2) Using a 27 mm deep socket wrench, install the oil pressure sensor to the rear transaxle case sub-assembly.
Torque:
20.6 N·m {210 kgf·cm, 15 ft·lbf}
NOTICE:
Be careful not to damage the O-ring.
(3) Connect the oil pressure sensor connector.
2. INSPECT FOR CONTINUOUSLY VARIABLE TRANSAXLE FLUID LEAK
Click here .gif)
3. RESET MEMORY
NOTICE:
If continuously variable transaxle parts have been replaced, refer to Parts Replacement Compensation Table to determine if any additional operations are necessary.
Click here


